

A Shopify toggle option gives customers a clean on/off switch on the product page, perfect for optional extras like gift wrap, rush processing, or gift receipts. The real power is that a switch can add a price only when it is turned on. Shopify has no native product-page toggle, so this guide shows how to add one for free with Optionify.
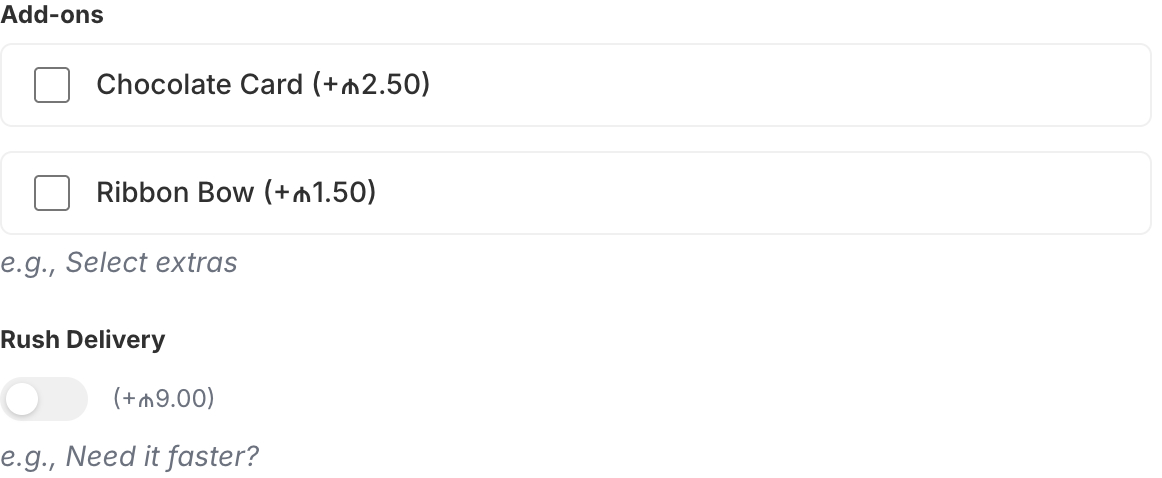 A Switch option adding gift wrap for a set price when enabled
How do I add an on/off toggle to a Shopify product?
Shopify has no native toggle for product pages. You cannot create an optional paid add-on with a simple yes/no control out of the box. Merchants often fake it with a separate product or a variant, which clutters the catalog and inflates the variant count.
A dedicated Switch option is cleaner. It sits on the product page as a single toggle, and it can carry its own price that applies only when the customer turns it on. Here is the setup in Optionify:
- Open Optionify and click Create option set.
- In the Option Set Editor, add an option and choose the Switch type.
- Label it clearly, for example "Add gift wrap" or "Rush my order".
- Give it an add-on price that applies when the switch is on.
- Assign the set to your products, set the status to Active, and save from Shopify's save bar.
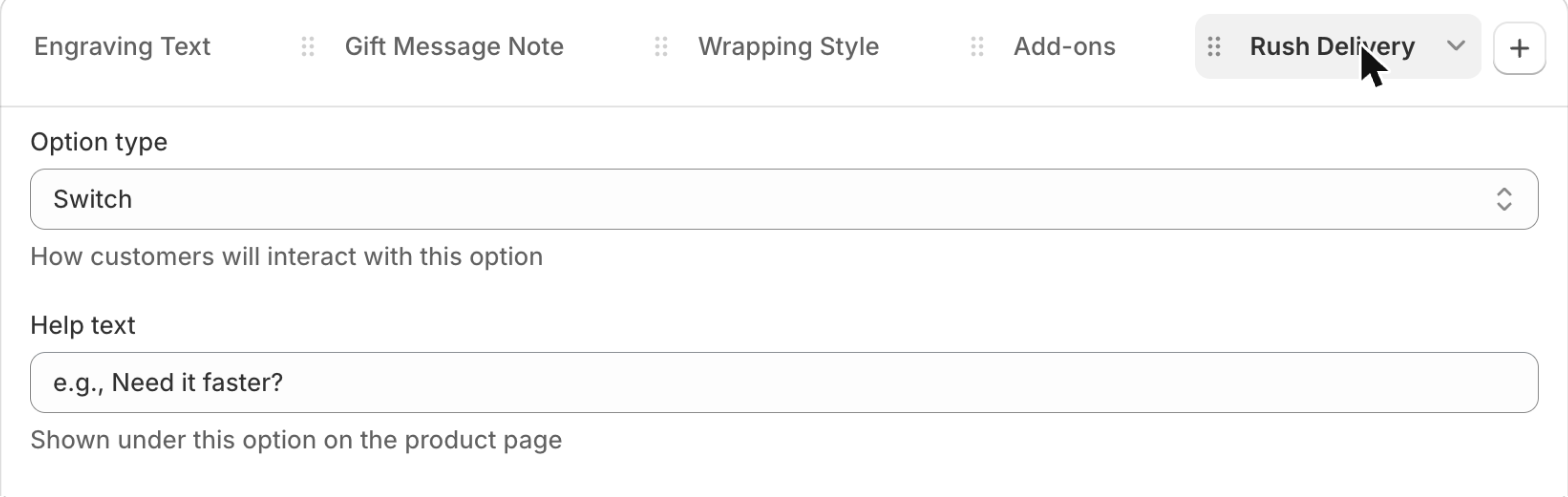 Set the Switch label and its add-on price in the Option Set Editor
Can a toggle switch add a price when enabled?
Yes. Give the Switch option an add-on price and the charge applies only when the customer flips it on. You can use a fixed amount, such as +$5 for gift wrap, or a percentage of the product price, which suits proportional fees like rush processing on expensive items.
Both pricing modes are live, and the extra reaches checkout through a hidden companion product. That means the charge is captured correctly even on accelerated checkouts. For the full pricing model, see pricing variants.
What can I use a Switch option for?
A Switch fits any single yes/no decision that changes the order. Common, revenue-generating uses include:
- Gift wrap — add a fixed fee like +$5 when the customer wants it wrapped.
- Rush or priority processing — charge a fixed amount or a percentage to jump the queue.
- Gift receipt or handwritten note — a free toggle that flags fulfillment.
- Add-ons and protection — include batteries, a warranty, or a care kit.
- Assembly or installation — offer a paid service alongside the product.
Because the price is optional, a Switch is a low-friction upsell. Customers add value with a single tap instead of navigating a separate product page.
When should I use a Switch instead of a checkbox?
Use a Switch for a single on/off decision, such as "add gift wrap" or "rush my order". Use a checkbox option when customers pick several independent items from a list, like choosing multiple accessories at once.
A Switch reads as one clear yes/no toggle and pairs naturally with a price that applies only when on. If you find yourself giving a customer three or more separate on/off extras, a checkbox group or several switches may be clearer than one control trying to do too much.
Where should the toggle appear?
Assign the option set to the right products using one of four methods: All Products, Tagged Products, Collections, or Individual Products. Gift wrap, for example, often applies to your whole catalog, so All Products is a good fit. A rush-processing switch might only apply to a made-to-order collection.
See understanding assign types to choose the right scope for each switch.
Can I use switches with conditional logic?
Yes, and this is where switches shine. A Switch is an excellent trigger for conditional logic. When a customer turns a switch on, you can reveal follow-up options that only make sense in that case.
For example, when a customer enables an "Add gift wrap" switch, show a textarea option for the gift message and an email input for the recipient. When the switch is off, those fields stay hidden and the product page stays clean.
 A Switch triggering follow-up options on the visual conditional logic canvas
Conditional logic is built on Optionify's visual flow canvas, so you connect a switch to the options it reveals without writing any code.
How does a switch appear in my order?
When a customer enables a switch, the selection is saved to the Shopify order as a line item property, and any add-on price is reflected in the order total. Your fulfillment team sees exactly which orders need gift wrap, rush handling, or the extra service, right on the line item.
This keeps operations accurate. There is no guessing whether an order was meant to include an extra, because the switch state travels with the order data.
Why the switch must show on your storefront
Optionify renders options through a theme app embed you enable once in the theme editor. If the embed is off, your Switch will not appear even when the option set is Active. Enabling it activates every option set across your store. If a toggle is missing, check the embed first in the troubleshooting guide.
FAQ
How do I add an on/off toggle to a Shopify product? Shopify has no native toggle. Use a free app like Optionify: create an option set, add a Switch option, label it, and optionally set a price that applies only when on.
Can a toggle switch add a price when enabled? Yes. Give the Switch an add-on price, fixed or percentage, and it applies only when the customer turns it on.
When should I use a Switch instead of a checkbox? Use a Switch for a single yes/no decision. Use a checkbox when customers pick several independent items from a list.
Is the Switch option free? Yes. Optionify is free forever, including the Switch, add-on pricing, conditional logic, and all 17 option types.
Does the switch charge work with Shop Pay? Yes. The extra reaches checkout via a hidden companion product, so it works with Buy it Now and Shop Pay.
Get started with Optionify
Ready to add paid extras with a single tap? Install Optionify from the Shopify App Store and add a free toggle switch to your product pages in minutes.
Install Optionify on the Shopify App Store — free forever.
New here? Begin with getting started with Optionify, then explore radio button options and checkbox options for more choice types.
Need help? Check the Troubleshooting Guide or contact support.